
M2 Oil Pressure Sender Replacement
|
Background:
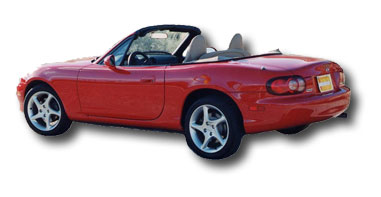
The Mazda Miata is a very well balanced car and a good value on a per-smile basis, but the one thing that has bothered me since I bought the car is the fake oil pressure gauge. In a brilliant move which must save $0.50 per car, Mazda replaced the original Miata's oil pressure sender which was a real analog gauge with a nice digital idiot light type unit. To keep the gauge from looking odd with the needle pinned, they install the gauge needle so that it sits in the normal range when there is any amount of oil pressure in the engine. So there is two states to the gauge, "normal" where you have pressure, and "dead" where the gauge and your engine are both "dead". As has been stated elsewhere, this is the worst of all possible solutions. An idiot light would most likely catch your eye rather quickly. But this gauge which never moves is easily forgotten and when the needle does move, chances are it won't be noticed.
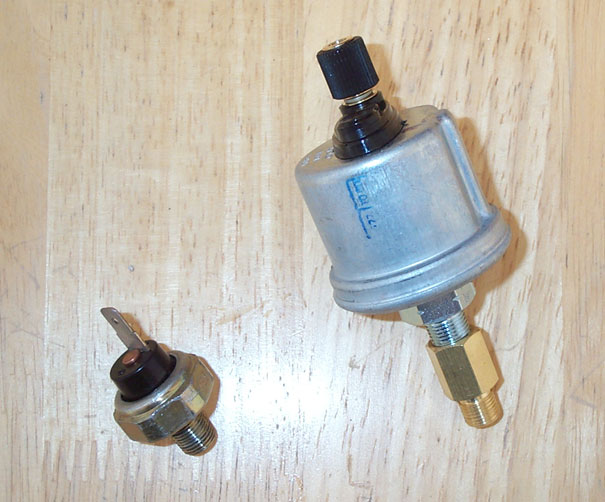
A couple possible solutions were suggested on the miata.net site. The first is to use an older miata gauge and sender. This does not work well on the M2 cars because the instrument cluster has been redesigned. The second solution found on miata.net is to use a sender from JC Whitney. This may work, but when I received my sender unit from them, I was so disgusted at it's quality that I never even considered putting it on my car.
I found a reference to using a VDO sender rather than that JC Whitney sender on miataforum.com. This looked really promising and my previous experience with VDO products had been good, so I thought I'd give it a shot.
Installation:
NAPA auto parts stores carry a VDO sender which works perfectly for the Miata. It's napa part: 701-1823 (it cost me $34.89) This sender does not contain a switch for a warning light, but VDO does make a version with that feature if you want to add a light to your instrument cluster. The one thing that you will need is a 1/8-27 to 1/8-28 BPT converter. I had ordered the adapter kit with the sender from JC Whitney so I used that.
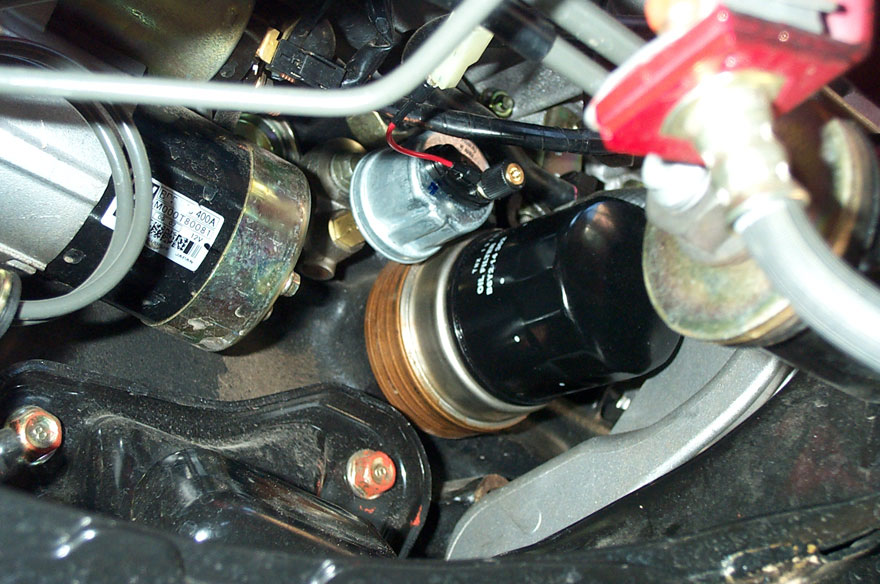
The oil pressure sender is on the right side of the engine above the oil filter. It's a pain to get to from all angles. I ended up cutting my wheels to the left and reaching in from behind the passenger wheel. This is only possible if you have long arms. A 24mm deep socket is ideal for removing the old oil sender switch. I have a 1-1/8" and 1" oil sender sockets and the 1" socket was too large. When unscrewing the old sender, about 2 tablespoons of oil will leak out, be ready to catch it.
The VDO sender and the thread adapter are considerably larger than the original switch. There is room to mount them, but they are very close to the oil filter. If you use a band type filter wrench to remove your filter, this sender assembly may cause you grief. I used teflon pipe tape on both threads and screwed the new sender in. I tightened it with a 17mm open end wrench.
The VDO sender doesn't have the same press-on connector that the OEM sender has, so I built a short adapter cable to use. You could cut the original connector off, but that's hardly professional.
I then started the car and checked for oil leaks. I then checked the position of the needle on the gauge. On my 2001 Miata, at idle with the engine almost warm the needle is between the "L" tick and the first tick. When the engine is at 3000 RPM, it's just left of the midpoint of the gauge. I wanted the needle a bit more centered on the gauge, so I did a gauge needle adjustment. The gauge needle can be adjusted by pulling it off the meter mechanism. To get to the needle, the instrument cluster must be taken apart. This is done by removing the lower dash panel under the steering wheel (two screws at the bottom), then the steering column covers are removed (three screws under the column). The Instrument cluster hood is removed by grasping it firmly and pulling toward you. After it is lifted out of the way, the clear instrument cover can be removed. This is accomplished by carefully pushing down on 4 clasps along the top while gently pulling the cover toward you. Set it down being careful not to scratch it or get the inside dusty. The needle on the gauges pull straight back off their axles. This should be done carefully to avoid bending the axle. I used an electronics chip puller, this is a "U" shaped metal piece with the ends of the "U" bent inward (about 1/8") to grip the underside of the chips. This makes an ideal "puller" for the gauge needle, and can be purchased at radio shack I think. I disconnected the wire going to the sender and started the car (this should be the highest possible reading on the gauge). I then pushed the needle in place (slightly) pointing at the "H" tick. I then reconnected the sender and noted the position of the needle. With the engine warm and idling, the needle is just left of the first tick, under normal driving conditions, the needle is almost exactly where it used to be with the switch sender. I then pushed the needle the whole way onto the gauge.
Tips and Warnings:
- The biggest warning I can tell you is that on my instrument cluster it was possible to push the needle on too far where it will get stuck on the gauge face. Mine didn't get stuck at normal operating positions, but wouldn't fall back to "L" when the car was turned off.
- Check for oil leaks, then check some more, drive around and check, drive to work and check. Oil is important, make sure you've got enough of it. I didn't have a leak, but I'm still paranoid about it.
- Putting a little Vaseline jelly on the contacts on the sender will prevent them from corroding and may save you a headache later.
Conclusions:
I'm not a big fan of modifying my cars, but the oil gauge was a glaring deficiency that I had to address. This is a relatively cheap solution that should only take a couple hours of your time to fix. And having a functioning oil pressure gauge in a sports car is a really nice thing to have. If you have any comments or questions feel free to e-mail me.